Jinlong's Blog

自己搭建静态博客的评论系统

起因

本来博客上的第三方评论系统“多说”用的好好的,突然有一天一个朋友跟我说多说的评论系统现在已经不能用了,而且众多国内的评论系统也都已经停止运营,他的博客换上了Disqus(链接)。我上去他的博客一看发现博文底下空荡荡的什么也没有,Disqus并没有被加载出来。后来经了解发现原来如果想用Disqus,就必须翻到墙外去才能用。这么一来几乎所有的hexo评论系统在国内都不能用了。于是想,既然我有自己的服务器,可不可以自己搭建一个像多说一样的评论系统呢。

实现

hexo的主题构架

我们先来借鉴一下多说在hexo中的实现,先看看hexo的主题构架(我用的主题是NexT.Pisces)。进入主题的layout目录
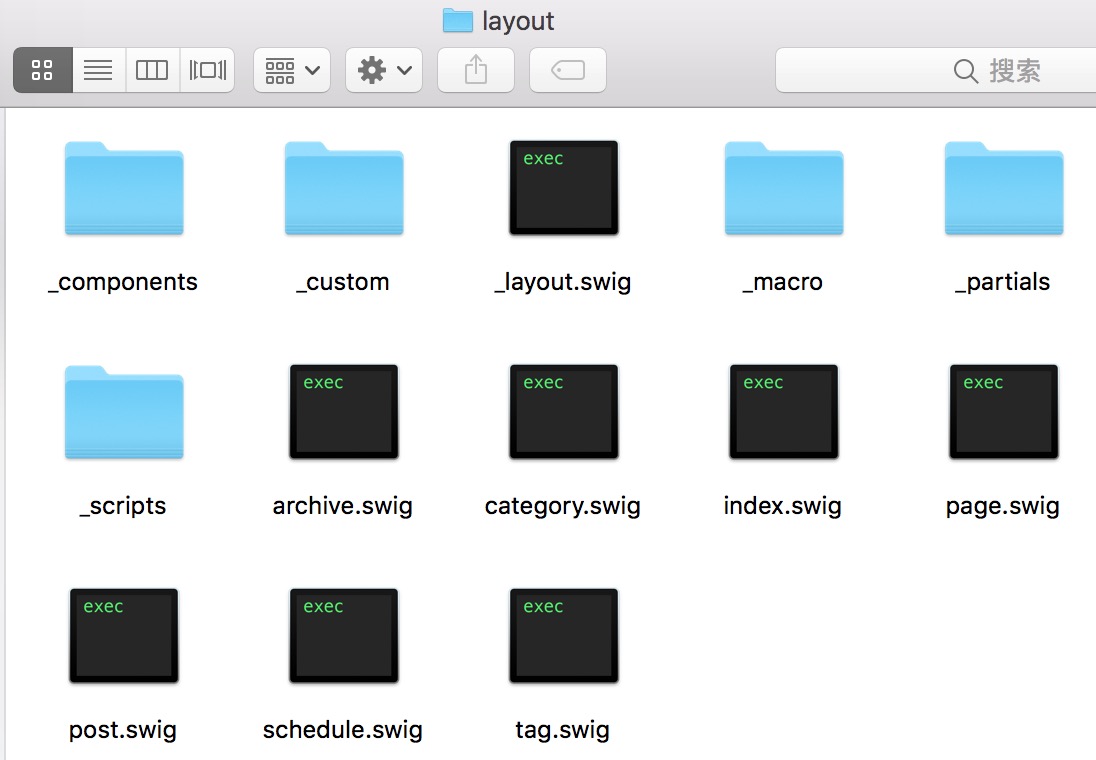
layout.jpeg
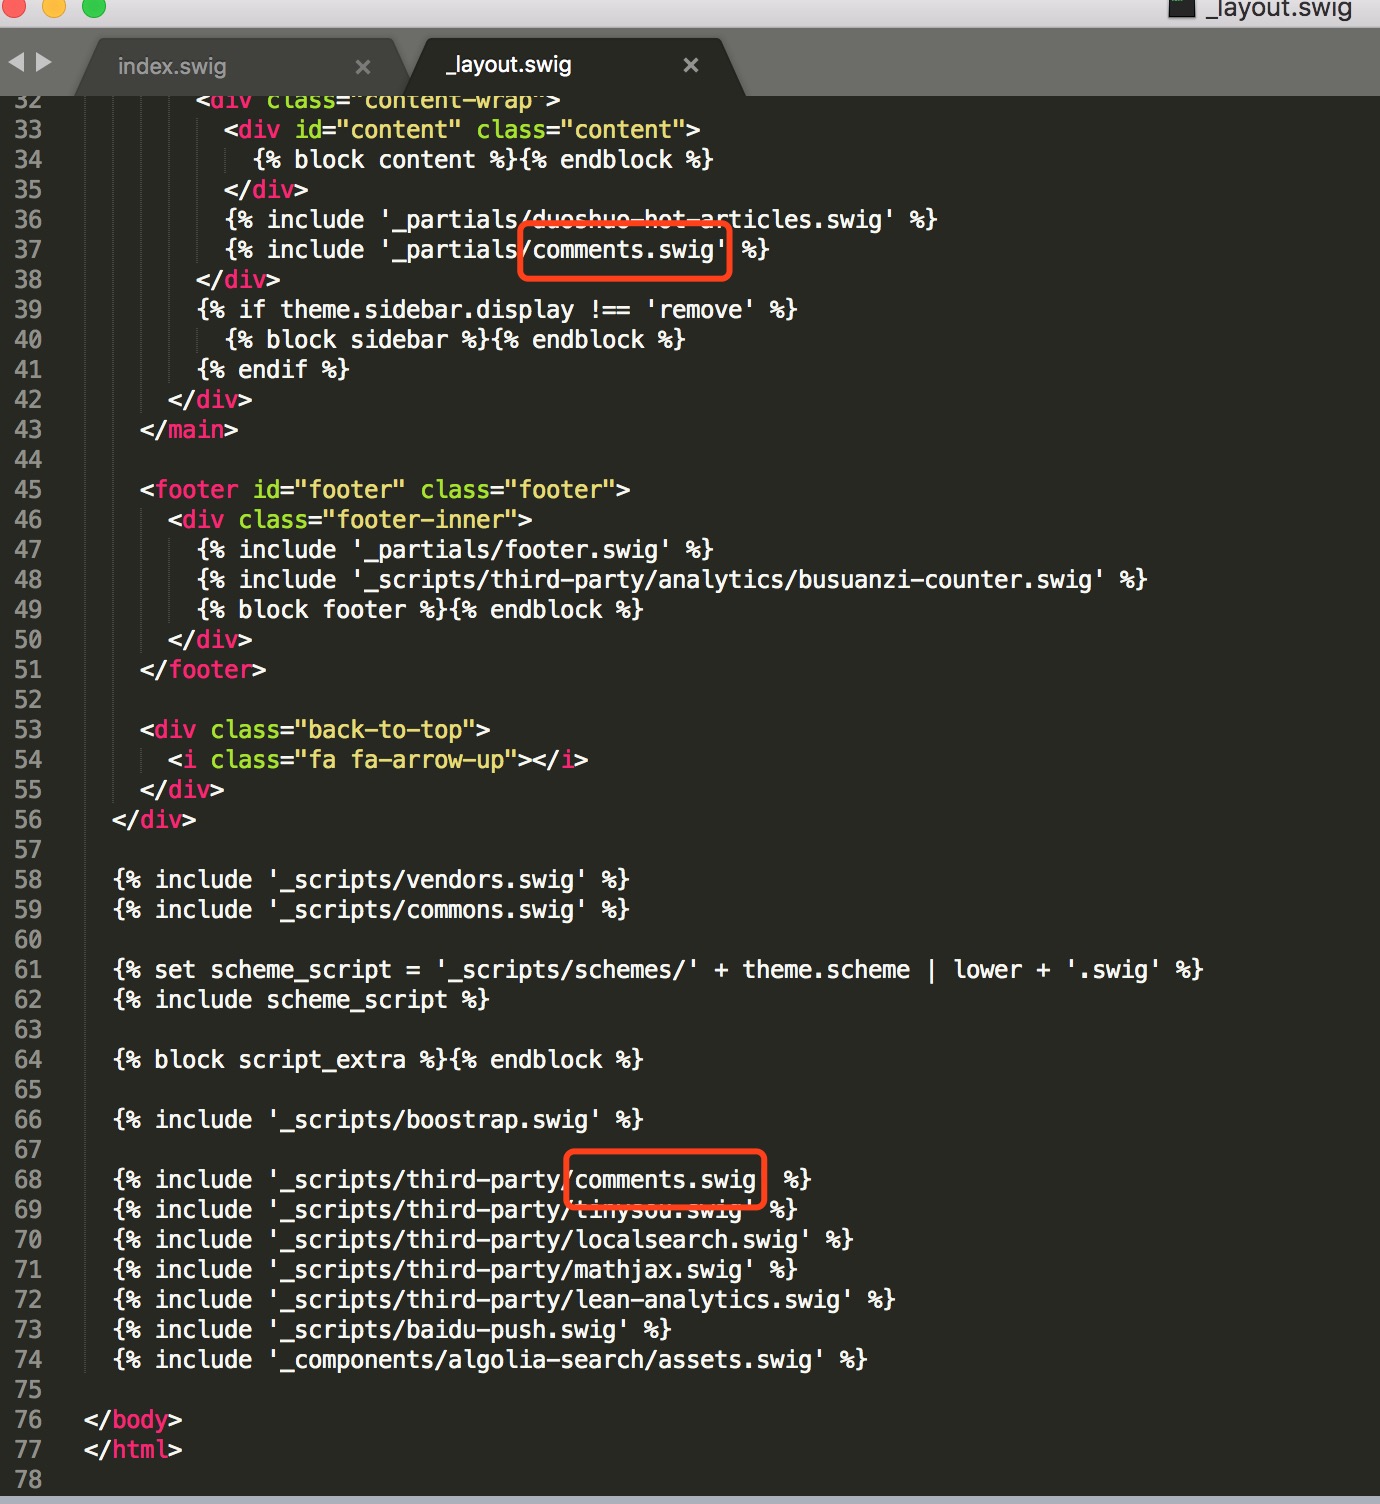
发现原来NexT.Pisces主题是用swig写的。我们来看看_layout.swig里面的内容:
layout1.jpeg
如图中所示,_layout.swig里面与comment有关的内容有两处(图中用红方框标注)。我们先看_partials/comments.swig的内容,如下所示:

1
2
3
4
5
6
7
8
9
10
11
12
13
14
15
16
17
18
19
20
21
22
23
24
25
{% if page.comments %}
<div class="comments" id="comments">
<% if (theme.duoshuo and theme.duoshuo.shortname) or theme.duoshuo_shortname %}
<div class="ds-thread" data-thread-key="{{ page.path }}"
data-title="{{ page.title }}" data-url="{{ page.permalink }}">
</div>
{% elseif theme.facebook_sdk.enable and theme.facebook_comments_plugin.enable %}
<div class="fb-comments"
data-href="{{ page.permalink }}"
data-numposts="{{ theme.facebook_comments_plugin.num_of_posts }}"
data-width="{{ theme.facebook_comments_plugin.width }}"
data-colorscheme="{{ theme.facebook_comments_plugin.scheme }}">
</div>
{% elseif theme.disqus_shortname %}
<div id="disqus_thread">
<noscript>
Please enable JavaScript to view the
<a href="//disqus.com/?ref_noscript">comments powered by Disqus.</a>
</noscript>
</div>
{% elseif theme.hypercomments_id %}
<div id="hypercomments_widget"></div>
{% endif %}
</div>
{% endif %}

在comments.swig中,先判断博客的评论功能是否为开启(page.comments是否为true),如果评论开启,则判断用户指定了哪一个评论系统,比如第一个if判断多说评论系统是否开启,第二个if判断facebook的评论插件是否开启等。这里拿多说举例,如果是多说评论系统,则插入一段html到网页中(应该是预留着用来渲染多说评论的样式的):

1
2
3
<div class="ds-thread" data-thread-key="{{ page.path }}"
data-title="{{ page.title }}" data-url="{{ page.permalink }}">
</div>

接着我们看第二处,_scripts/third-party/comments.swig里面的内容:

1
2
3
{% include './comments/duoshuo.swig' %}
{% include './comments/disqus.swig' %}
{% include './comments/hypercomments.swig' %}

里面简单地引进了3个swig文件,以多说为例,我们接着跟进./comments/duoshuo.swig:

1
2
3
4
5
6
7
8
9
10
11
12
13
14
15
16
17
18
19
20
{% if (theme.duoshuo and theme.duoshuo.shortname) or theme.duoshuo_shortname %}
......
<script type="text/javascript">
var duoshuoQuery = {short_name:"{{duoshuo_shortname}}"};
(function() {
var ds = document.createElement('script');
ds.type = 'text/javascript';ds.async = true;
ds.id = 'duoshuo-script';
ds.src = (document.location.protocol == 'https:' ? 'https:' : 'http:') + '//static.duoshuo.com/embed.js';
ds.charset = 'UTF-8';
(document.getElementsByTagName('head')[0]
|| document.getElementsByTagName('body')[0]).appendChild(ds);
})();
</script>
......
{% endif %}

以上代码只贴出了与评论相关的内容,至于其它的一些多说文章搜索等功能相关的省略掉了。我们看上面的js代码,此段代码先创建一个script标签,接着将其src指向多说域名下的一个js
文件(此文件已经失效,我猜这个js的功能是获取数据,然后渲染_partials/comments.swig里面的多说相关的div,让其成为多说评论的最终样子)。
至此,多说评论系统在hexo中的前端实现就大致看明白了。

跨域请求与获取数据

由于博客域名跟多说域名不是同一个域名,所以这里涉及到跨域传递信息的问题。在之后的实现中,我们使用jsonp的方式进行跨域传递信息。这里举一个jquery文档里面的官方例子:

1
2
3
4
5
6
7
8
9
10
11
12
13
14
15
16
17
18
<script>
(function() {
var flickerAPI = "http://api.flickr.com/services/feeds/photos_public.gne?jsoncallback=?";
$.getJSON( flickerAPI, {
tags: "mount rainier",
tagmode: "any",
format: "json"
})
.done(function( data ) {
$.each( data.items, function( i, item ) {
$( "<img>" ).attr( "src", item.media.m ).appendTo( "#images" );
if ( i === 3 ) {
return false;
}
});
});
})();
</script>

jquery会随机生成一个函数名,来替换掉flickerAPI里面的第二个?,假设这个函数名为jquery123456。只有服务器响应的数据格式为jquery123456(xxx)的时候才能成功调用done函数,其中xxx是json数据。根据约定,参数data的内容将会是是xxx的内容。

前端实现

首先呢,我们修改_partials/comments.swig里面的内容,加入自己的评论框样式(暂且把自己搭建的这个第三方评论系统叫shuoshuo…..),如下:

1
2
3
4
5
6
7
8
9
10
11
12
13
14
15
16
{% if page.comments %}
<div class="comments" id="comments">
{% if theme.shuoshuo %}
<div id="shuoshuo_comment">
<h3>Comments</h3>
<hr>
<div id="comment_list" data-key="{{ page.path }}">
</div>
<div id="post_box">
<input type="text" id="name_" placeholder="input your name here" /><br>
<textarea id="content_" placeholder="input what you want to say here"></textarea><br>
<button onclick="submitComment()">submit</button>
</div>
</div>
{% elif (theme.duoshuo and theme.duoshuo.shortname) or theme.duoshuo_shortname %}
......

此时记得在主题的_config.yml中加入一项

1
2
# shuoshuo
shuoshuo: true

接着我们在_scripts/third-party/comments下新建一个swig文件叫shuoshuo.swig,内容如下:

1
2
3
4
5
6
7
8
9
10
11
12
13
14
15
16
17
{% if theme.shuoshuo %}
<script type="text/javascript">
var shuoshuoQuery = {short_name:""};
(function() {
var ds = document.createElement('script');
ds.type = 'text/javascript';
ds.async = true;
ds.id = 'shuoshuo-script';
ds.src = (document.location.protocol == 'https:' ? 'https:' : 'http:') + '//23.106.145.179:8090/test/create.js';
ds.charset = 'UTF-8';
(document.getElementsByTagName('head')[0]
|| document.getElementsByTagName('body')[0]).appendChild(ds);
})();
</script>
{% endif %}

代码功能很简单,就是动态引进一个js脚本23.106.145.179:8090/test/create.js(获取数据和渲染评论的代码将会在里面,23.106.145.179是我的服务器地址)。接着我们修改_scripts/third-party/comments.swig将shuoshuo.swig include进来:

1
2
3
4
{% include './comments/duoshuo.swig' %}
{% include './comments/shuoshuo.swig' %}
{% include './comments/disqus.swig' %}
{% include './comments/hypercomments.swig' %}

最后呢,我们看看23.106.145.179:8090/test/create.js到底干了什么:

1
2
3
4
5
6
7
8
9
10
11
12
13
14
15
16
17
18
19
20
21
22
23
24
25
26
27
28
29
30
31
32
33
34
35
36
37
38
39
40
41
42
43
44
45
46
47
//闭包
(function() {
var box = $('#comment_list');
var key = box.data('key');
//利用jsonp的方式从服务器获取评论数据,接着渲染在网页上
window.loadComment = function() {
$.getJSON("http://23.106.145.179:8090/test/?jsonp=?", {
key: key
}).done(function(data) {
prehtml = "";
for(var i = 0; i < data.length; i++) {
prehtml += "<p>name: " + data[i].name + "<br>time: " + data[i].createTime + "<br>content: " + data[i].content + "</p>";
}
box.html(prehtml);
});
}
//向服务器提交评论,由于ajax不允许跨域,所以依然使用jsonp的方法
window.submitComment = function() {
var name = $('#name_').val();
var content = $('#content_').val();
if(name == undefined || name == "" || content == undefined || content == "") {
alert("name or comment can not be null");
return;
}
$.getJSON("http://23.106.145.179:8090/test/post_comment.jsp?jsonp=?", {
key: key,
name: name,
content: content
}).done(function(data) {
console.log(data);
//刷新评论列表
loadComment();
$('#name_').val('');
$('#content_').val('');
});
}
//网页刚被打开的时候加载好评论
loadComment();
})();

后端实现

后端要做的工作比较简单,就是负责响应客户端的请求和存储数据就好了,另外要防范一下xss和sql注入,我们来看看数据库结构:

1
2
3
4
5
6
7
8
create table comment(
id int primary key auto_increment,
domain varchar(128) not null,
comment_key varchar(200) not null,
name varchar(128) not null,
content varchar(2048) not null,
create_time timestamp default current_timestamp
);

domain、comment_key、name、content、create_time分别为域名、文章路径、评论人昵称、评论内容、创建时间。标识一篇文章的评论列表的组合键为(domain:域名,comment_key:该域名下的文章路径或者文章名)。

https之痛

由于github pages中强制要求使用https协议,在使用https网站中使用http外链是不允许的,我并没有https证书,无奈之下只能将博客转到国内的coding的pages服务上(coding允许使用http)。

后记

如下面所示,自己写的这个第三方评论功能并没有样式,看起来比较简朴,一个比较牵强的理由是这样比较显复古风(其实是因为博主懒得写了0.0)。原理挺简单的,有兴趣的朋友可以自己搭建一个。如果自己懒得写了,也可以给我发一封邮件(邮箱地址在博客的“关于我”中可以找到),我可以把你的域名加入我服务器的允许域名中,然后直接用我的评论系统。